Monday, September 29, 2014

Anchors Away

I don't know if Anchors Away makes any sense, I was just trying to think of something sailors would say about an anchor.  So I apologize to any boater extraordinaire that are unimpressed by my knowledge of nautical language and wit.

My lovely friends Laura and Dan have this house that has this incredible waterfront right in their backyard.  It seriously feels like you're on vacation at a lake house 24/7.  I'd probably be so lazy and unproductive with that scenery.  And they have this sunroom that is pending-nautical themed, so these coasters were inspired to kickstart the decor!

Ingredients:
-Cork
-Scissors
-Hot glue gun
-"Rope" - I used jewelry making rope line material
-Acrylic paint/paintbrush

First cut out your cork coasters.  I traced a ribbon spool for the circles, but use whatever household item you've got that's in a sufficient cup-holding shape.

Take the rope and hot glue in small sections into a spiral design.  You're fingers may be hot-gluified by the end, but it's totally worth it.  If you ever do use a hot glue gun and get glue glops on your skin, make sure you don't peel it off until it's dry.  It will hurt way less and cause less damage this way, I promise.

Hot glue dries super quickly, so you can paint the anchors right away.  I used a navy blue acryllic paint and free styled it.  I'm sure there's tons of stencils out there too.


These will go perfectly with rum drinks - because that's what pirate drink right??


Tuesday, August 5, 2014

Soapy Stud

Okay so this post is super late.  I took pictures for it months ago, as I made these for my Ma/Gma for Mother's Day.  Procrastination at it's finest.  Unfortunately crafting doesn't pay the bills...  Anyways, per my dilemma from 3 months ago, it is always so difficult to get gifts for Mother's Day.  And I really do get a lot of joy out of giving people a great gift that they love/appreciate.  Anything that my Mom wants or needs she'll just buy herself, so I always try to be really thoughtful and man is it tough!  Of course, I know my Mom/Gma really just want to spend time with me, so I'm already giving them the perfect gift, but I wish I could also get them something they really love.

So instead of buying something this year for Mother's Day I decided to make gifts.  My Grandma is a big bath person, so I decided on bath salts for her.  And for my Mom, I decided on scented soaps since I don't think she's ever had the time to relax and take a bath!

Both of these items are great gifts that are easy to make.  Let's start with the bath salts.

Ingredients:
-Epsom Salts
-Baking Soda
-Food coloring
-Essence of whatever you want to smell like
-Jar/Container

Literally all you do is dump the ingredients together in a bowl, mix to the desired effects (smell/color), and put in your container.  I used Mason Jars for these babies.  I used about 2-3 cups of Epsom Salts, and then a half cup-ish of baking soda.  My scents were Orange Mint, and Lavender Eucalyptus mixes.  It's really not an exact science - more of a go with the flow type thing.  It would have been great to also add some sprigs of lavender or mint.  My house smelled AHH-MAZING after for a few days.  I'm planning on making a jar or two for myself to freshen up the bathroom, and to use whenever I want to jacuzz.  Jacuzz is a verb right??  If not it totally should be.  Who doesn't love the occasional jacuzz.

And now the soaps.  I made two separate kinds:  Orange Citrus and Honey Almond Oatmeal.

Ingredients for Orange Citrus:
-Soap base (I used Goats Milk Soap Base from Michaels)
-Soap molds
-Food coloring
-Citrus essence (I used orange, I think lemon would be good too)
-Chopped up orange peels
-Food coloring

Ingredients for Honey Almond Oatmeal:
-Soap base (again I used Goats Milk Soap Base from Michaels)
-Soap molds
-Oatmeal
-Honey
-Almond essence

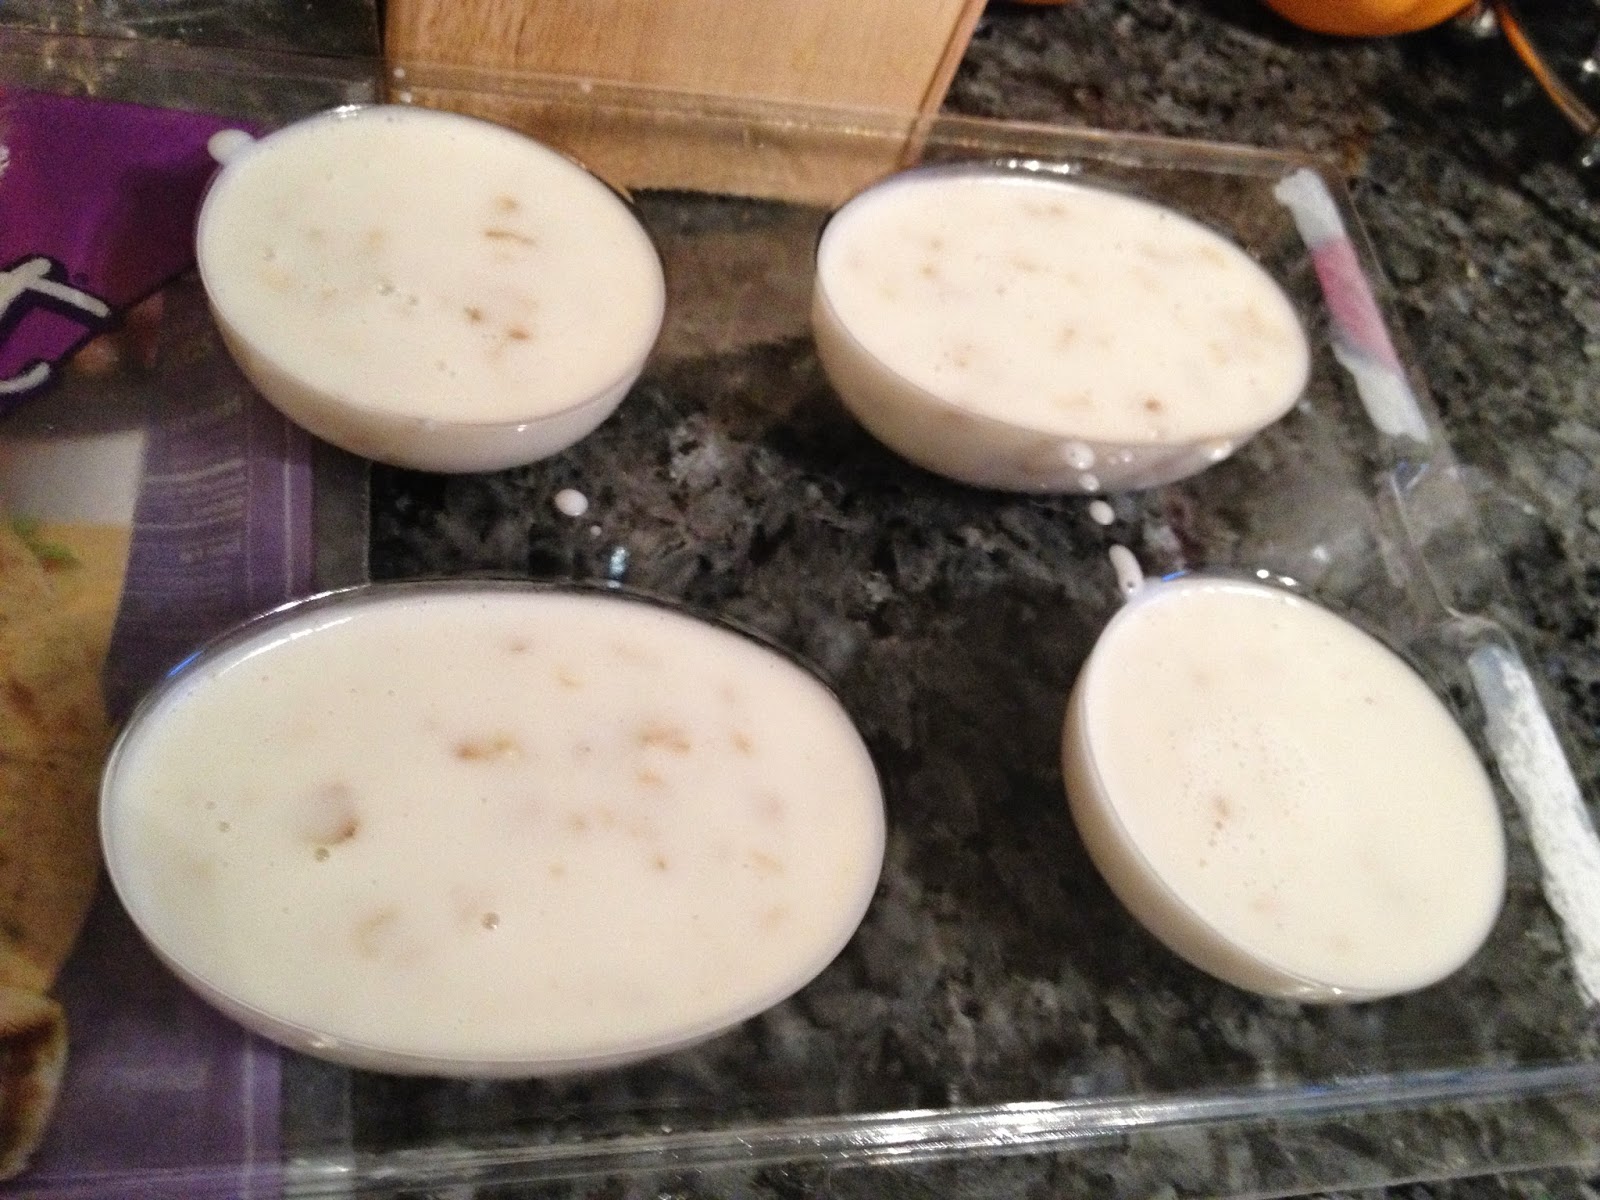
The first step is to melt the goat milk soap base.  Put in a microwave safe bowl, and heat at 30 second intervals, stirring in between.  Throw in your ingredients and stir.  I don't have any specific measurements because it really depends on your personal preferences and how perfumey you want to be.


Pour into your soap molds and let sit.  I let sit for about 30 minutes, and then put in the fridge for another hour.  They should solidify fairly quickly.


 Remove from the molds and use immediately to clean up your mess!


Monday, May 12, 2014

Mosaic Patio Oasis

I have been a little busy bee buzzing around to get my patio/deck space ready for Spring/Summer, so please pardon my absence! 

I’ve never bought patio furniture before, but common sense told me it would be reasonably priced since there’s no way a wicker love seat meant for the outdoors would cost more than my living room furniture.  Granted, I bought pretty cheap furniture as soon as I graduated from college thinking it would be temporary and in a year I would be a real adult and ready to make chic and modern couch purchases.  And now here I am three and a half years later with the same cheap couch and chair that has increasingly become scarred with cat scratches.  Luckily, with Sid’s couches the cats stay away and don’t claw it.  I guess they think this is there couch, which is probably pretty accurate.

Anyways, to my displeasure and shock, patio furniture is freaking expensive!  Who knew??  Prices always seem to mess with my beautiful vision.  But, thankfully I am crafty and decided to make the best of it.  My plan is to have a small love seat on the “deck” right outside our kitchen door.  I was able to find a cost effective compromise on amazon for a rattan love seat.  You can see the deck here:
 I do love it!  But I still need to spruce it up with some more flowers, and outdoor cushions/pillows.  The highlight of the porch is this beautiful iron Peacock I found at a market in Baltimore!  I can put my empty wine bottles and he is just beautiful.  I’m obsessed.  And now my wine selection will depend on which wine is in the prettiest bottle.  


Now for the patio part of our outdoor space.  I wanted to have a bistro table and chairs so we could eat dinner outside, or have a romantic glass of wine with flowering vines in the background.  But something that is easy to move around for when we entertain and have people over outside.  Sid has a TV dinner stand that we didn’t use, so I thought it’d be perfect to transform into my bistro table. 


There’s a warehouse in Baltimore called “The Loading Dock” where you can buy all sorts of discounted home construction materials.  So, I went there to pick up some tiles that I was planning on putting on the table, to give it that chic bistro feel.  I got these guys for $5.  I have no clue what they would normally cost, but seemed cheap to me!  I picked up some tile glue and grout at my favorite local Ace, and set to work.

It took me several hours until I was happy with a design pattern.  Now I seriously give complex mosaic-ers a lot of credit – that takes a lot of artistic vision to do!  My pattern is obviously very simple, and unfortunately as I don’t have a tile cutter and I’m using all different sizes of tiles, there are some bigger empty space areas.  And I think the grout in a tube I bought is tough to evenly spread out, so I've got some messy spots.  But for my purposes I’m happy and satisfied!


Once the arranging is done, you just glue each tile and let set for 72 hours.  Then you can grout, and wait another 72 hours for it to set!  But finally, you’ll have a beautiful and easy (despite length process) mosaic bistro table!  Now I just need some bistro chairs…


Where the romantic bistro area will hopefully soon go:


Monday, March 31, 2014

A One Night Stand

So my poor darling Sid is...at a ripe age...and doesn't even own a nightstand.  I felt so sad looking at my bed and my side having a nightstand with interesting objects sitting on it's top and the drawers filled with wonderful trinkets.  And all poor Sid has got is a little fold out tv tray stand.  How sad.

But this gave me a chance to have an exciting hunt for a nightstand!  I found this beauty on craigslist for $30.  It was not in the best shape.  One, the color wasn't doing it for me.  Both the metal drawer runners were broken.  And it was pretty dusty.  But I loved the detail and thought it was beautiful.

I fixed the metal drawer runners with my fancy flower print hot glue gun.  I should have taken a pictures to show the damage.  Unfortunately I'm not a welder, although I did take metal shop in 8th grade.  Those are the only qualifications you need right?  I probably should have bought some new drawer runners, but the hot glue seemed to work fine and it should hold up.

After that, this job was just a sand, spray paint, and repeat job.


Originally I was going to paint the detailing on the drawers, but I kind of love the all white simplicity and cleanness of it all.

Isn't she a beaut??


Monday, March 17, 2014

Everything is Better with Ice Cream

A fun fact about me.... I'm kind of a gelato aficionado.  Maybe aficionado is a bit extreme...perhaps more like enthusiast.  Either way, I've tasted the best gelatos out there!  I was in attendance (completely by accident/miracle) at the 2013 Firenze (Florence for you non native Italian tongues) Gelato Festival.  Things could not have been sweeter.  The winning gelato was actually a ricotta cheese gelato which sounds a bit off, but was so delicious.  I've also had Rose flavor, which is surprisingly fabulous.  Florence was by far the best food of anywhere I've eaten in Italy.  There was one place where I had a pasta with rabbit and truffle sauce.  Oh. My. God. delicious.  I have to say, when I was in France and Italy I felt famished the whole time.  I missed American food so much!  Plus it's so much more convenient in America and getting food quick when you're on the go.  It's more of a sit down, relax, and ENJOY feel in Europe, which was awesome to do a few times, but more often than not I wanted to go see things and walk around and lose myself in the streets of Paris or Venice or Rome.  Which quite literally happened more than I'd like to admit because reading maps are difficult.

So back to gelato!  I was at Safeway recently and took a gander down the ice cream lane, because I have very little self control, and found this eye catching gelato.  I'm a sucker for cool jars/containers, plus the flavor was Sea Salt Caramel, which I feel is such a hip flavor nowadays.  Naturally, I was enticed and couldn't help myself.  The Sea Salt Caramel did not disappoint!  I tried the Cookie Crunch flavor too, which was not nearly as tasty.

I've collected a few of these jars, and since I didn't want to throw them away from their tasty charm, I decided to hop on the "succulents" band wagon, and plant some of those guys in these containers.  I by no means have a green thumb...I recall a horrible incident from my youth related to gardening, in which i was helping my mom plant some flowers in the front yard, and after using the spade to dig a hole, I touched a worm!!  I think it happened at the worst age, you're old enough to care that worms are gross, and still young enough to be impressionable.  Hence, my fear of worms begins and gardening career ends.


I feel like the whole succulents/cactus plants are really hip right now.  You can find them everywhere.  So I bought these three little guys at my favorite local ACE.  They were $3.99 each.  I really have no basis as to whether that's a good price or not, but seemed okay to me.


Per my worm-ending gardening career, I can't really tell you the best methods for planting these little guys.  All I did was put potting soil in the talenti gelato jar, smush in my succulent, and watered him.  In retrospect, I probably should have poked a hole in the bottom for drainage.  I made the potential fatal flaw of confusing succulents for cacti, as I was thinking "oh I won't even have to water it!"  I suppose I could go back and easily drill or cut some drainage holes in the bottom.  But I'm lazy, and they've been alive and looking great for a few days so I'm going to assume they're going to be okay!  Either way, I think they're adorable!  Another victory for ice cream!!


Tuesday, February 18, 2014

Dream on Bad Boy!

Sid has always had a bulletin board that he claimed was his "dream board."  Here's a picture of the poor thing:

How glycemic index facts are a "dream" is beyond me, but that is definitely not a dream I want to have.  Let's just leave non-delicious food components out of this.  So, as a Valentines Day present, I decided to revamp this dream board a bit.

Here's what you'll need:
-Roll of cork board
-Hot glue gun
-Modgepodge
-Frames
-Acrylic Paint/Paintbrush
-Scissors or boxcutter
-Push pins
-Things Dreams are Made of!
-Maps (optional)
-Letters (optional)

This is obviously pretty subjective and you'll add personal touches.  Anything I didn't have I got at Michaels.

Step One:
Paint the frames


Step Two:
Unroll the cork and hot glue to your frames.  Because I bought rolled up cork, I had to lay some heavy textbooks overnight to flatten it out.  See, you totally will use those college books again.  Totally worth the $500/semester I spent.

 Step Three:
I hot glued ribbon onto the large cork board, and then modgepodged the maps I got onto cork board, with the idea to pin all the places Sid and I have visited together. 


Step Four:
Hang your pieces up.  I got letters to spell out D-R-E-A-M.  You could do whatever, get a little R-E-S-P-E-C-T action, whatever you're into!

And that's pretty much it!  I put this up over the desk in our office space, so it would give us motivation whenever we need a break from work.  Yeah, because I totally work after work hours.  Psh.  On a serious note, I think it's really important to keep track of your personal and professional goals and dreams.  This, is of course the finished product minus the dreams!  But I can guarantee you the glycemic index sheet will not be on here...